Availability Per Account Type
Trial
Lite
Pro
White Label
WL – Custom
Introduction
We have created a way to upload videos to your EZWebPlayer Account from your iOS device. Once the equipment being used has made the initial “handshake”, following menus and cue prompts should meet with success for most iPhone and Android devices.
Notes
- Please keep in mind that our 10 second test video ended up being 43.4MB. So, longer, raw videos have a greater chance of hitting the upload cap and might result in failed uploads. This will differ for each device, so, testing is a good idea before using this method for a project with a deadline.
- Many mobile devices do not force you to use a high definition (HD) video setting. Unless you are determined to shoot at the absolute highest, or near highest settings, the process of shooting and uploading from your mobile device to any management app is better facilitated through the connection from wireless to fixed infrastructure with small files.
- For best case results, use very good to best wireless connections for uploading, as opposed to marginal and worst available wireless connections.
- Video settings for mobile will have more success than the higher resolution and larger file videos. For instance, if you met with success uploading a video using a 5 MBps bit rate or higher from a laptop or desktop, you might have some issues from a mobile. Stick to lower bit rates; try 4 or less.
- There are several elements in uploading videos from mobile that govern success. The two most common are the local bandwidth spread available and wireless WIFI access. Merely ascertaining the raw limits from the local owner of the WIFI subscription, or reading the label on a provider’s equipment label or invoice may not give you a true picture of actual wireless bandwidth capability and access at any given moment. If the WIFI channel being used to a router is being shared with other users, your bandwidth is also being shared which reduces your available bandwidth.
Getting Started
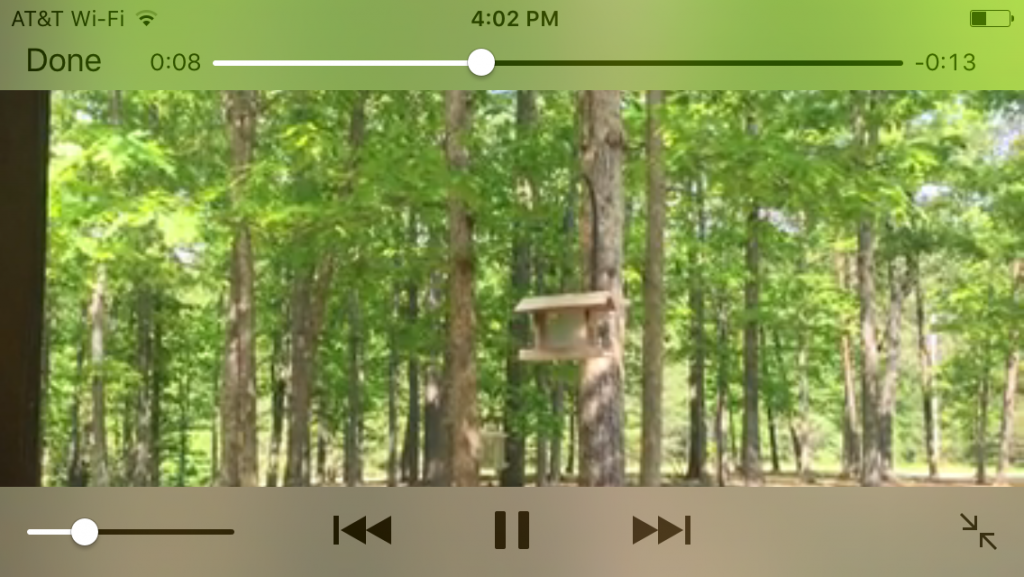
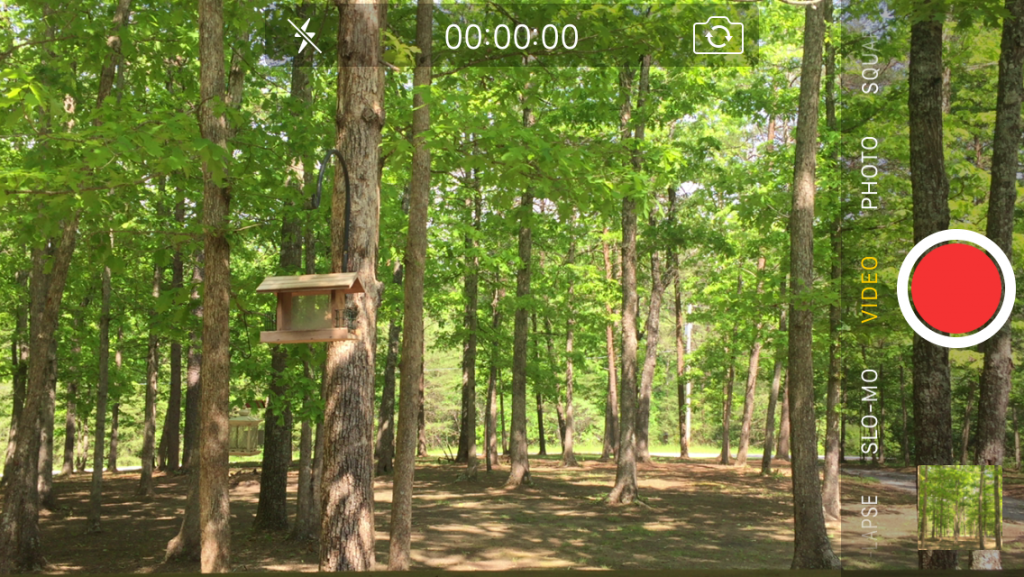
Step 1. Record a video using your IOS device.
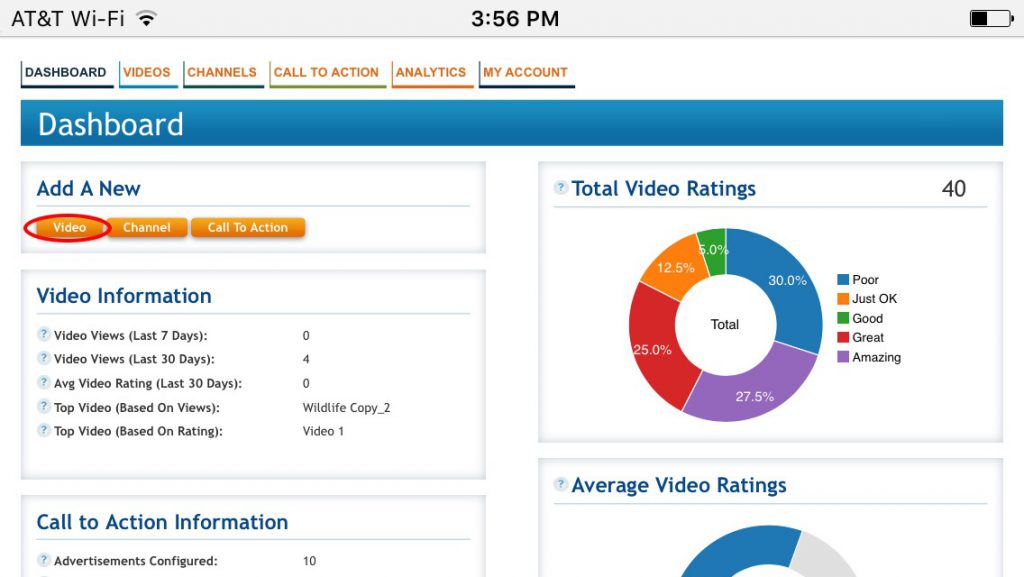
Step 2. Log into your account from your devices browser and click to add a new video.
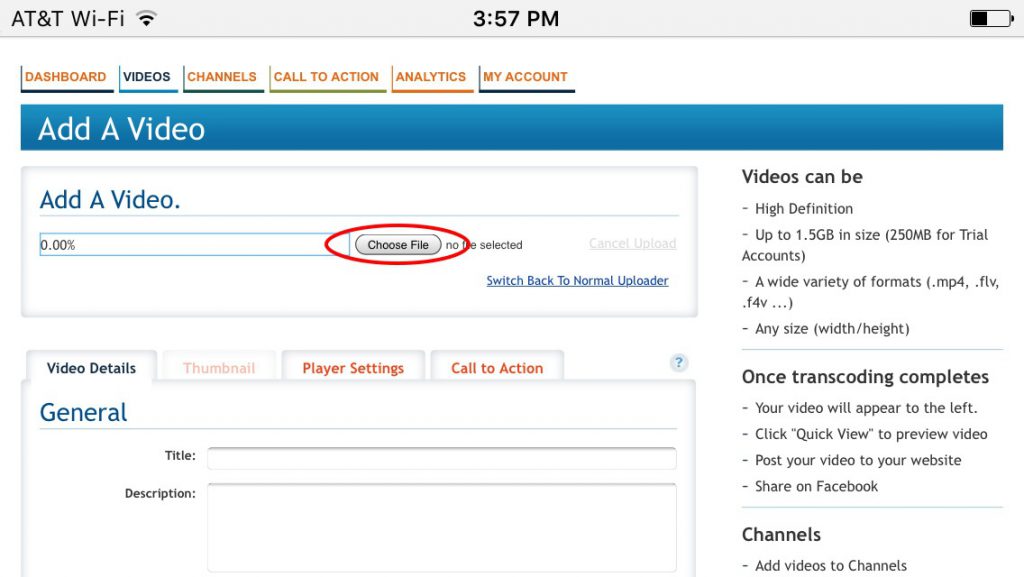
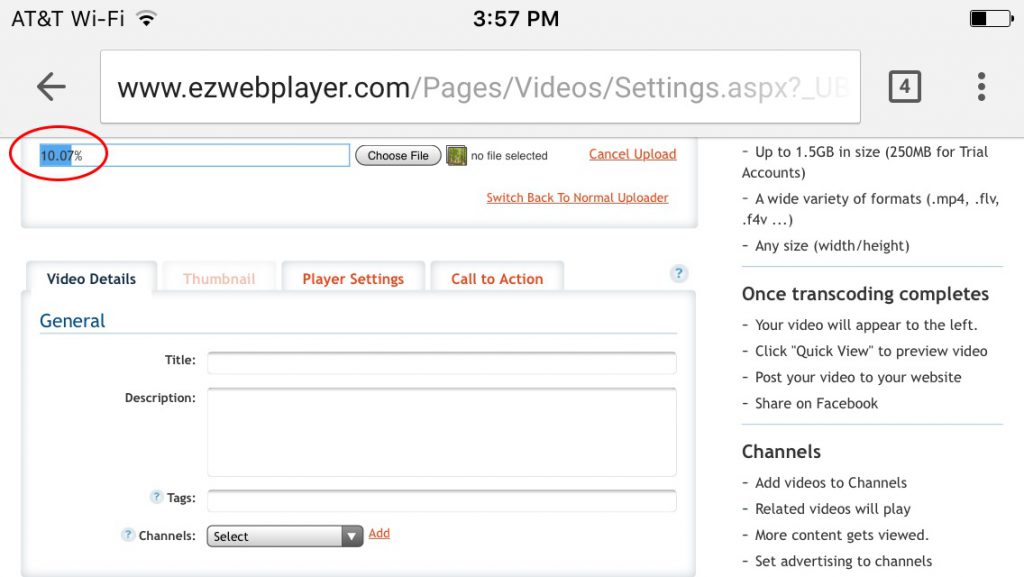
Step 3. Click Choose File.
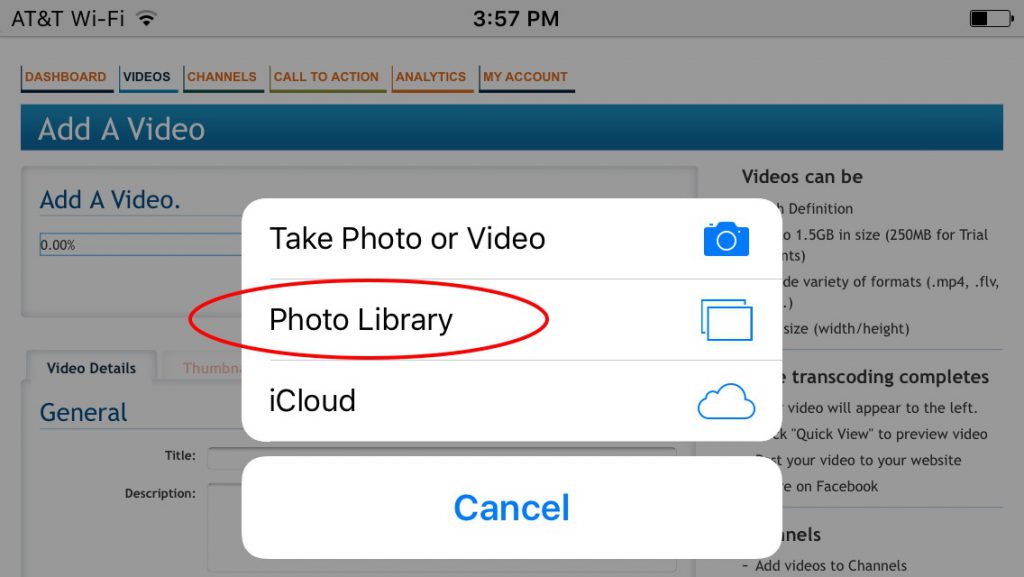
Step 4. Go to your Photo Library for prerecorded video or take a video on the fly. In this example we will use the Photo Library.
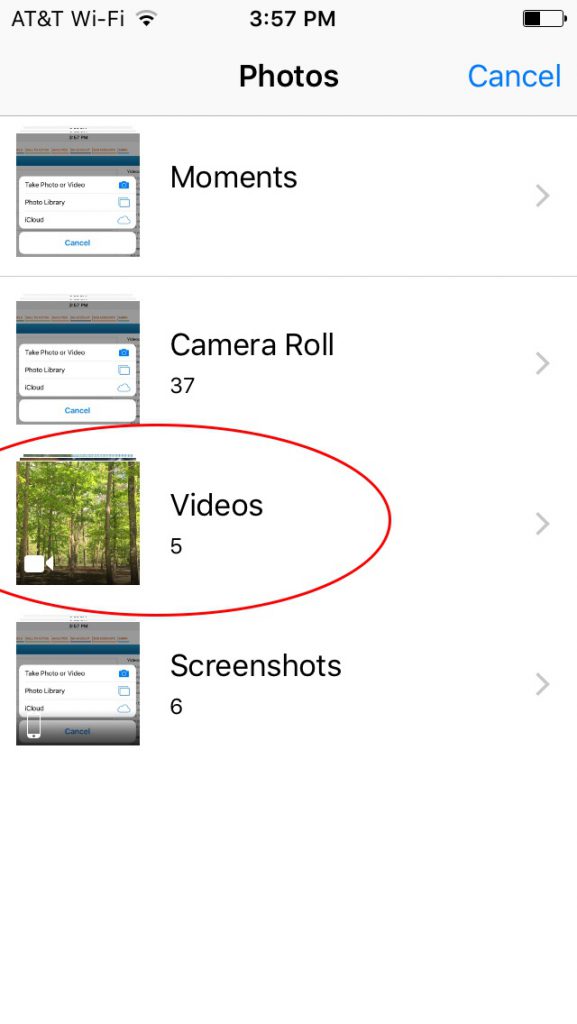
Step 5. Click Videos.
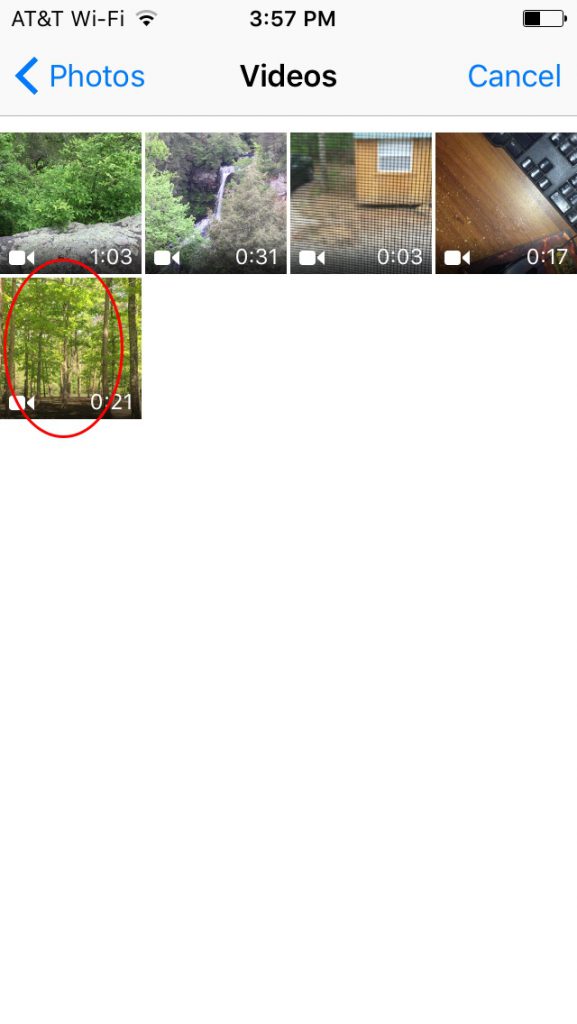
Step 6. Select your video to upload.
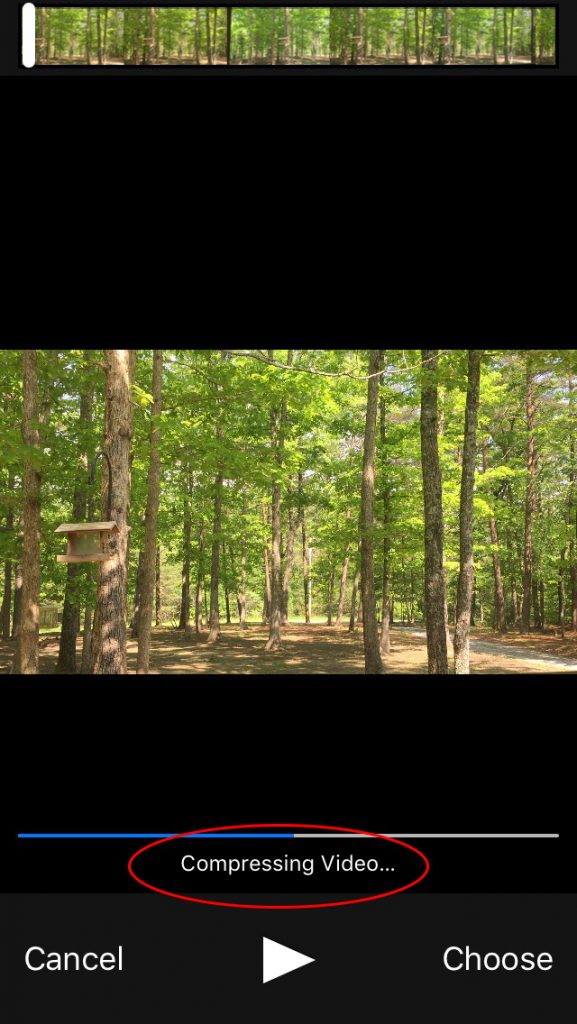
Step 7. Play / Review your video to make sure it’s the correct one and click Choose.

Step 8. Your video will start to compress.
Step 9. Once the compression is complete it will start to upload to your account.
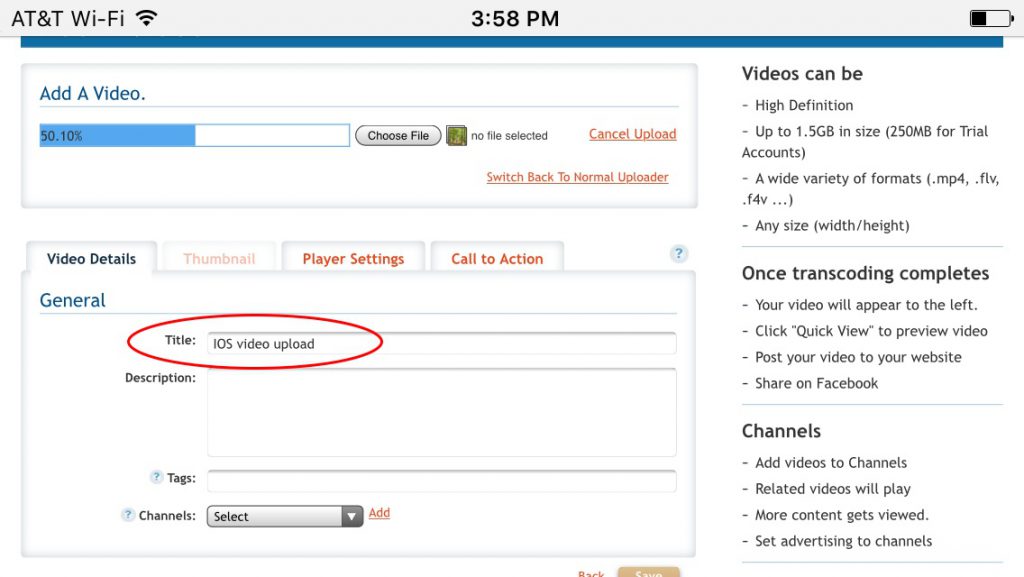
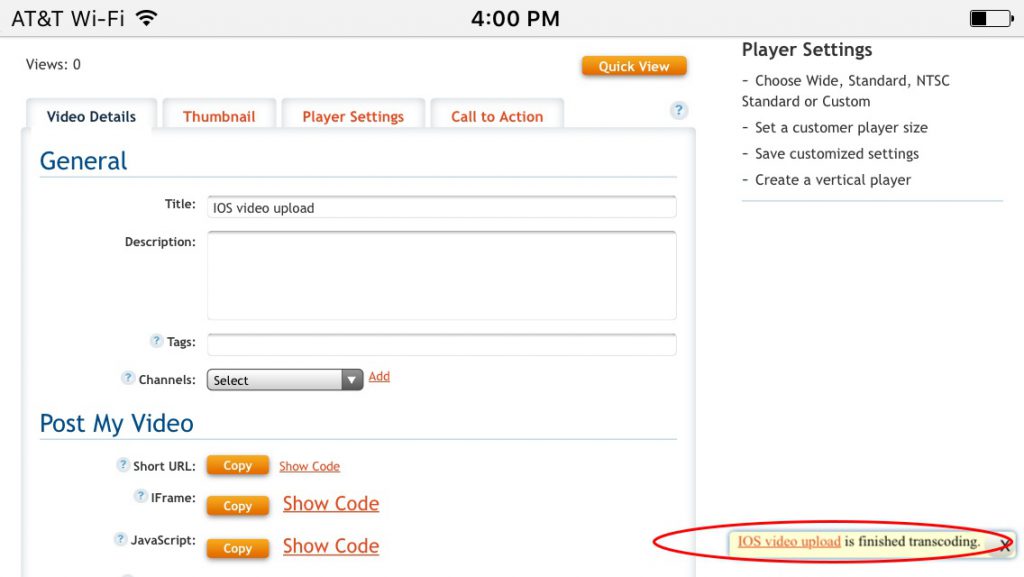
Step 10. Title your video.
Step 11. Once upload is done your video will start to transcode.
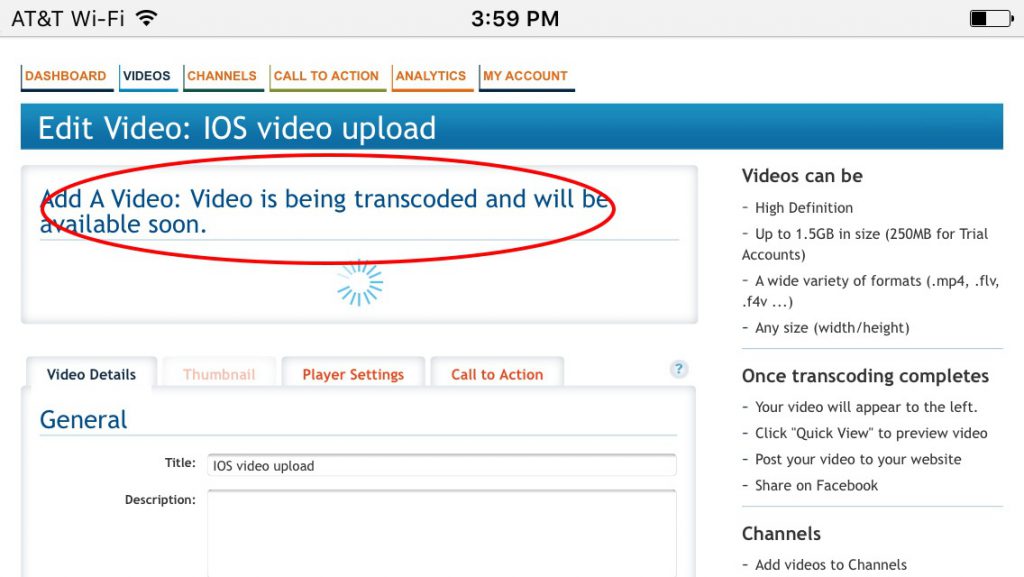
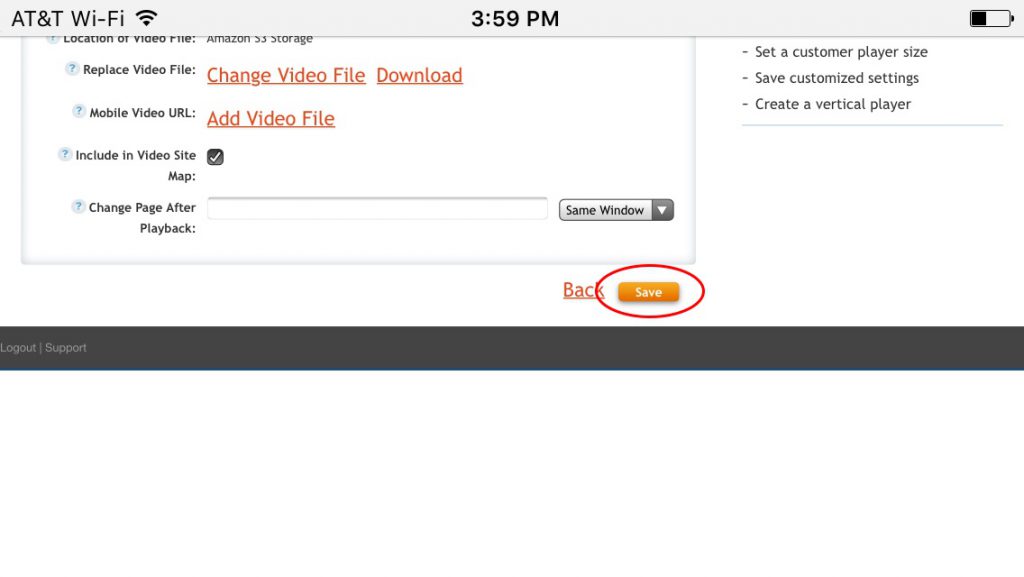
Step 12. Scroll to the bottom of the page and save this new video. Typically, the SAVE button is blocked until the Transcoding process begins. Transcoding and uploading are two separate steps but happen automatically in serial.
Step 13. Once transcoding is done, you can now use the Quick view option to review your video. At this time you can also use the Post My Video section to share your video to Facebook or other sites.
Step 14. Once on the quick view page you should see your video ready for viewing. Your video might or might not have a thumbnail. Thumbnail creation is the last process in the transcoding process and this might or might not be completed by the time you have viewed your video’s quick view page, but it will be in a few minutes.

Play / review you’re newly added video. You are all set; you have added a video to your account from your IOS device.